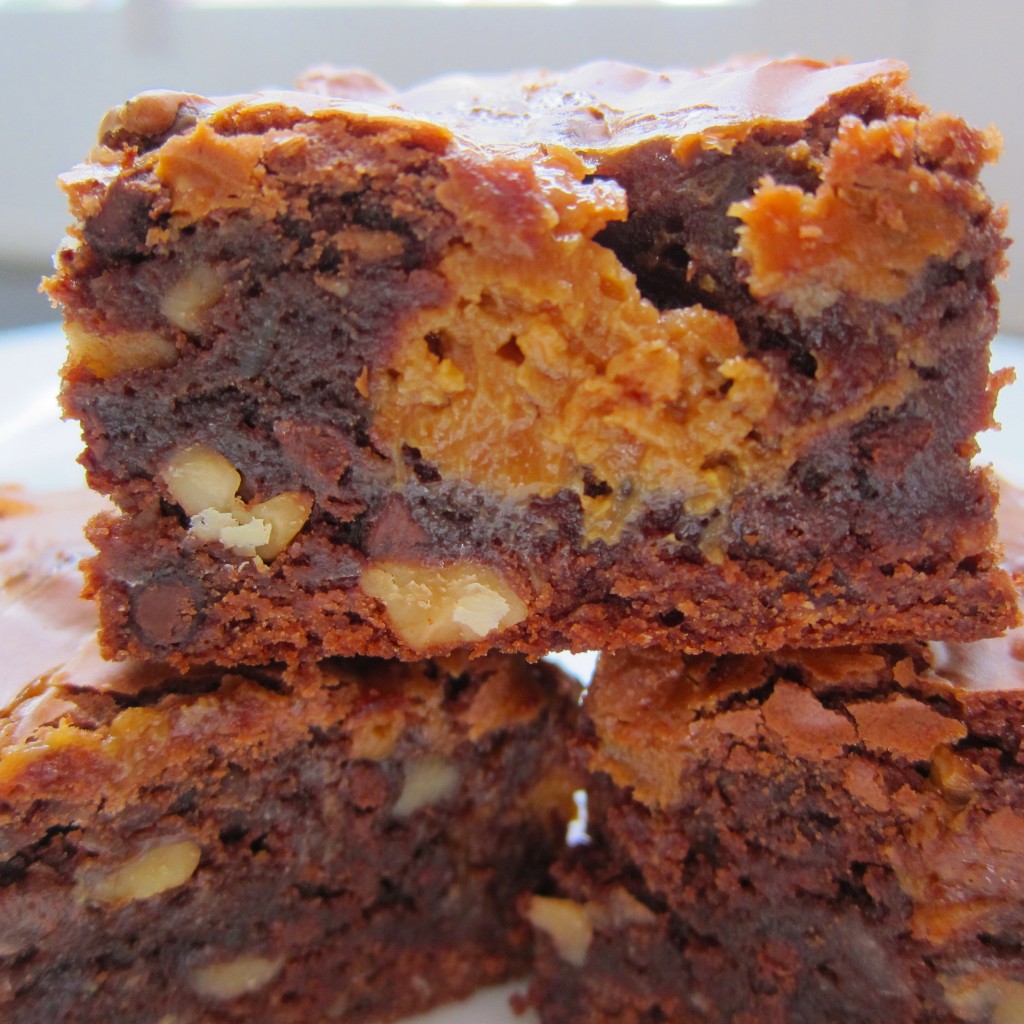
JB Bars

JP, this one’s for you.

Since traveling to Australia is sort of like going to the U.S. from a size perspective, we chose to visit three cities: Melbourne, Sydney and Port Douglass (an hour outside of Cairns).

In each of the three cities, a delightful little petit-four like cookie was served alongside coffee for a taste of something sweet at the end of meals.

The little treats started with a shortbread base.  To which a layer of penuche, or brown sugar fudge was added.

The squares were topped by a layer of chocolate.

These are kind of like million dollar shortbread.  Only not.

Once we got home I spent some time trying to find a name for these little guys.  No luck.

So, TD and I decided to name them ourselves.

While in Sydney, we met up with our friend Julia (and Jennifer and Myra).  They were there leading a group of college students and while it’s a sad state of affairs to have to go halfway around the world to spend time with someone who lives less than 10 miles away, good fun was had by all.  Some of that fun was the discussion, debate and general admiration of a certain footie player from the Sydney Swans.

Australian rules football is fantastic.  TD and I caught a Sunday game in Melbourne (at the historical MCG) between the Richmond Tigers and the Carlton Blues.  It was a crisp afternoon in early fall with huge clouds and a cool breeze.  Beer, meat pies with tomato sauce and some very….athletic athletes.  It doesn’t get much better.

Australians are fervent sports fans and on their island nation, the Sydney Swans are royalty.

Their crowned prince?  That certain footie player, Jude Bolton.  A prolific athlete–315 games in his 14 year career thus far–Mr. Bolton is, according to JP, also an ace bloke.   Dear readers, meet Jude.

Photo source: Phil Hillyard / News Limited via FoxSports.

By now you’ve figured it out.  JB Bars are short for Jude Bolton bars.  Because, we like him that much.

As for the Sydney Swans…well…Australia seems to have a knack for using American fight songs as their own.  The Sydney Swans fight song is set to the tune of the Notre Dame fight song.  Make what you will of that little nugget.

If you like this, you might like these.

Salted Caramel Squares

Twix Bars

JB Bars

penuche layer adapted from Stephanie Stiavetti at www.theculinarylife.com everything else is Misanthropic Hostess

Shortbread Base

Ingredients

  • 10 TBS butter, cold
  • 1/4 C brown sugar
  • 1/8 C granulated sugar
  • 1 1/4 C flour
  • 1/8 C salt

Directions

  1. Preheat oven to 235 degrees.
  2. Line an 8X8 or 9X9 pan with parchment so that pieces hang off the end on all four sides.
  3. In a food processor, pulse together sugars, flour and salt.
  4. Cut butter into 1/2 TBS pieces.  Using pulse function on the processor, add-in pieces one-at-a-time until the dough just barely comes together.
  5. Refrigerate for 20 minutes.
  6. Press dough into pan.
  7. Prick dough all over with fork.
  8. Bake on middle rack until golden brown (20-30 minutes…begin checking at 20 minutes or when you  begin to smell the butter cooking).
  9. Remove from over and allow to cool completely.

Penuche & Chocolate Layers

Ingredients
  • 2½ cups brown sugar
  • 2½ cups white sugar
  • 1¼ cup whole milk or half and half
  • ½ cup unsalted butter
  • ¾ teaspoon salt
  • 1 teaspoons pure vanilla extract
  • 8-12 ounces chopped chocolate (I used bittersweet) depending on how thick you’d like the layer.  I used about 9 ounces.

Directions

  1. In a heavy saucepan over medium-low flame, heat brown sugar, white sugar, milk, butter, and salt to 236F while stirring constantly. This should take 20-25 minutes.
  2. Pour penuche into the bowl of a stand mixer. Beat on medium for 2-4 minutes, or until fudge is thick and smooth. Lower speed to low and add vanilla extract.
  3. Using a spatula greased with butter, spread penuche fudge on top of shortbread base, smoothing out the top. Refrigerate for 30 minutes.
  4. While the penuche is cooling, melt chocolate in a double boiler or in microwave (50% power, 30 seconds at a time, stirring in-between until chocolate is melted and smooth).
  5. Spread chocolate evenly over penuche layer using an offset spatula.  Allow to harden.
  6. Lift entire concoction from pan using the ends of the parchment.  Cut into 1-inch squares.
  7. Serve or use within two or three days.  Will keep slightly longer if stored in an air-tight container.  Do not refrigerate.


Shake Your Cherry Ripe Bonbon

I love wandering the aisles of grocery stores in other countries.  I may be overstating this assertion, but I think grocery stores are a pretty accurate proxy of a country’s cultural, political and even geographical positions.  The snack food aisle (often aisles) is one of my favorite.  I love perusing the exotic packaging and, when I can cipher  the language, the strange and wonderful flavor combinations.  I’ll admit, part of the allure is the “ewww gross” factor.  Smoked shrimp Doritos?  Limberger Cheetos?  Disgusting…and yet…completely fascinating.

While I generally draw the line at observation on the salty snacks, international candy is a favorite of mine to bring back as gifts (especially since many of the interesting varieties can be purchased through duty-free shops, helping with the customs issue).  I probably brought back $50 worth of candy from Hong Kong a couple of years ago.  I have no idea what it was…but the packaging was gorgeous.

Before heading to Australia, a friend of ours gave TD the inside line on her favorite Aussie candy bar: Cabury’s cherry ripe.  Intrepid chocolate triers that we are, we managed to procure a cherry ripe within hours of landing in Melbourne.  Dark chocolate+coconut+glace cherry bits makes an excellent combination.

Photo credit: http://www.cadbury.co.nz/products/bars/cherry-ripe.aspx?p=3550

Once the cherry ripe seal was broken, there was no going back.  In order to preserve our own innocence, I purposefully did not count the number of cherry ripe bars purchased while “in-country.”

I did realize early on however, that the coconutty-cherry middle had a very similar consistency to the needhams I made last fall.

And so, upon return to the U.S., I got down to business recreating the cherry ripe bar into bonbons.  The middle of a cherry ripe bar is darker than my little bonbons…more of a crimson than a candy apple.  But, candy apple was the only red food gel I had in my stash at the time.  I ordered the glace cherries from Amazon.  I’m fairly certain the only thing anyone uses those things for are fruit cakes…and the middle of summer is decidedly NOT fruitcake season (insert joke here).

I used a 1/2 ounce scoop to form the chilled guts into little balls.  Then I froze the balls and, pulling them out of the freezer in batches of 12 or so, dipped them in dark chocolate.

TD claims these taste very similar to the original.

Provided their lurid color, I think they’d make a good halloween treat.

Soundtrack

INXS (the original, not the one they tried to make over a few years ago).  These guys were a major part of the musical landscape that was high school for me.  Need you Tonight, Suicide Blonde and New Sensation all bring to mind images of swim meets and beach days at La Jolla Shores.  What I didn’t find out until later was that the band’s original name was The Farriss Brothers: Andrew, Jon and Tim.  While the spelling is different, two of the three are what my father and grandfather are called.

Cherry Ripe Bonbons

Ingredients:

  • 1/2 cup mashed potatoes (not seasoned) (you could easily get this amount from a single large russet potato)
  • 1/4 teaspoon salt
  • 1 lb  confectioners’ sugar
  • 1/4 cup butter
  • 7 ounces flaked coconut
  • 1 teaspoons vanilla
  • 7 ounces glace cherries, finely chopped (you can also buy “cherry chips” where the chopping has been done for you
  • red food gel
  • 18 ounces (about 1 1/2 packages)  chocolate chips or chopped bittersweet chocolate
  • 1/2 paraffin wax block, the same paraffin you melt to use on top jam (2 1/2 by 2 1/2)

Directions:

  1. Pare, cook, and mash potato to make three-quarters of a cup. Add salt.
  2. If you are making recipes right after boiling the potato, use the still-warm sauce pan or dutch oven. The pan should still be warm enough to melt the butter off the heat.  If not, turn on heat to low and allow butter to melt.
  3. Turn off heat and add mashed potato, confectioners sugar and gel.  Fold to evenly mix color.
  4. Add-in flaked coconut, chopped cherries and vanilla.
  5. Mix well and turn into a buttered 9X9 inch pan and spread evenly.
  6. Refrigerate to harden.
  7. When hard, scoop and then roll into balls (I used a 1/2 ounce scooper).
  8. Place cut squares back into the fridge until dipping.
  9. For the dipping chocolate, again use a double boiler or place a heat-proof bowl over a sauce pan of simmering water.
  10. Add paraffin and allow to melt.
  11. Add chocolate and allow to melt.
  12. Stir well to mix ingredients.
  13. Dip in the chocolate mixture (with a fork, toothpick, or my personal favorite, bamboo BBQ skewer).
  14. Place on waxed paper to harden.


The shortbread experiment continues

A while back, I experimented with a Thomas Keller shortbread recipe.  As a note in the recipe, he casually throws out a slight alteration for chocolate shortbread.  I couldn’t resist.

The substitution is simple–just replace some of the flour with high quality dutch-processed cocoa.

Because I can’t leave well enough alone, I also added the zest of an orange to the dough.

Then I iced each little square with a simple concoction of confectioner’s sugar and blood orange juice.

These were really intense.  And, in my opinion, better than the original shortbread recipe.

If you like this, you might like these

Chocolate Cayenne Cookies

Wold Peace Cookies

Soundtrack

Carol King

Shortbread

adapted from Thomas Keller and Sebastien Rouxel in Bouchon Bakery

Ingredients

  • 13 TBS (1 stick + 5 TBS) (180 grams) unsalted butter at room temp
  • 1/2 C (90 grams) superfine sugar
  • 1/2 + 1/8 tsp (2 grams) kosher salt
  • 1 tsp vanilla extract
  • 1 1/4  all purpose flour
  • 3/4 C unsweetened alkalized cocoa powder
  • zest from 1 large orange (optional)

Directions

  1. Place the butter in the bowl of a stand mixer fitted with a paddle attachment. Cream until smooth on medium-low speed.
  2. Mix-in zest.
  3. Add 1/2 C (90 grams) sugar and the slat, mix on medium for about 2 minutes until fluffy.
  4. Scrape down the  sides and bottom of the bowl.  Add the vanilla and mix on low speed for about 30 seconds to distribute evenly.
  5. Add the flour and cocoa in two additions, mixing on low speed for 15-30 seconds or until just combined.  Scrape the bottom of the bowl to incorporate any flour that may have settled.
  6. Mound the dough on the work surface and, using the heel of your hand or a pastry scraper, push it together into a 5-inch square block.  Wrap in plastic and refrigerate for at least 2 hours, until firm.
  7. Position the racks in the upper and lower thirds of the oven and preheat to 325 degrees.  Line two pans with parchment paper.
  8. Unwrap the dough and place between two pieces parchment paper.  With a rolling pin, pound the top of the dough working from left to right to begin to flatten it.  Turn the dough 90 degrees and repeat.
  9. Roll-out to a 9 inch square.  If the dough has softened, slide it (still inside the parchment) onto the back of a sheet pan and refrigerate until firm again.
  10. Using a chef’s knife, cut the dough as desired.  The original recipe calls for 3 cuts horizontally and 5 cuts vertically so that you have 24 2 1/4X 1 1/2 inch pieces.
  11. Dust the tops of the dough with sugar and arrange on baking sheets leaving 3/4 inch in between each.
  12. Bake until pale golden brown, 17-19 minutes.  Set the pans on a cooling rack and cool for 5 to 10 minutes, transfer the cookies to the rack to cool completely.

For icing

  • If you would like to ice the cookies, begin with 1 cup of confectioner’s sugar, whisk in orange juice or water 1 TBS at-a-time until the icing is of desired consistency.  Dip cookies and allow icing to dry.

Warning: these may cause marital…conflict

Here’s how it went down.

Committees are a necessity of working in higher education.  It’s how we roll.  There are weeks when I spend more time in committee meetings than in my office.  I know the same is true for my colleagues.  So, for the committees I chair, I try to bring something good to eat when we meet.  Most of my committees are small; a dozen cookies or a loaf cake more than do the job.  But, if everyone shows up, the committee I chair the first Wednesday of every month can be a beast.  A handful of cookies would only agitate them.

So, it was with good intent that I set out to make some chocolate chip oatmeal cookies to go alongside another treat for March’s meeting.

When the cookies were done, I set aside exactly the number I needed for my meeting and gave TD the rest.  To be clear, I handed over at least a dozen and a half of these guys.

The bag of cookies was never seen again.

The evening before my meeting, I set out the cookies and cake I’d made so that I’d remember to grab them on the way to work.  When I got up, only a handful remained.  I stood there for at least two minutes trying wish the cookies back into existence.  There wasn’t time to make another batch and I was kind of irritated that someone who didn’t make the cookies and didn’t need them for a meeting had decided to eat them (and we aren’t talking about the Kitchen Gods).

The reply when asked about the missing cookies: “But I was hungry.”

To this I asked, “What about the bag of cookies I gave you?”

“They’re gone.”

“But that was two days ago.”

“So?  They were my cookies.”

“You knew these were for a meeting”

“But I was hungry.”

The good news is that this must be a pretty decent oatmeal cookie recipe.

The bad news?  If you are TD, revenge will be mine when you least expect it.  Sleep with one eye open my friend.

Great minds think alike.  While the recipe below is totally respectable, if you are looking for an oatmeal cookie recipe that’s a little more exotic, try out Ann’s Cranberry Chocolate Chip Oatmeal Cookies. The addition of wheat germ is genius I tell you.

TLCs

adapted from Bouchon Bakery, Thomas Keller & Sebastien Rouxel

Ingredients

  • 1 C + 1 1 /2 TBS (153 g) all purpose flour
  • 1/2 tsp (2.3 g) baking soda
  • 3/8 tsp (1 g) ground cinnamon
  • 1/2 C + 3 1/2 TBS (138 g) granulated sugar
  • 1/4 C + 1 1/2 TBS (75 g) lightly packed dark brown sugar
  • 7 1/2 ounces (212 g) unsalted butter at room temp.
  • 1 egg (52 g)
  • 1 3/4 C (134 g) old fashioned oats
  • 2 C chocolate chips
  • 1 C coarsely chopped pecans (optional)

Note: the original recipe makes 6 very large cookies using a #10 (2 1/2 inch) ice cream scoop.  I needed more than 6 cookies (though, that’s what I ended up with) and so used  a 3/4 inch scoop to yield about 3 1/2 dozen cookies.

Directions

  1. Sift flour, baking soda and cinnamon together into a medium bowl.  Set aside.
  2. Add butter to the bowl of a standing mixer fitted with a paddle attachment and cream the butter on medium speed until it is the consistency of mayonnaise and holds a peak when the paddle is lifted.
  3. Add the sugars and mix for 3-4 minutes until fluffy, scraping down the bowl as needed.
  4. Add the eggs and mix on low for 15-30 seconds until just combined.  It’s okay if the mixture looks broken.
  5. Add the dry ingredients in two batches, mixing on low for 15-30 seconds after each.  Scrape the bottom of the bowl to incorporated all ingredients.
  6. Add the oats, chocolate chips and pecans and incorporated by hand.
  7. Refrigerate dough for 30 minutes.
  8. Preheat oven to 325 degrees and position racks in the upper and lower thirds of the oven.
  9. Scoop cookies to desired size and place on parchment-lined half sheets leaving at least 2 inches in between cookies.
  10. Bake until golden brown–14-16 minutes rotating sheets halfway through.  Remove from oven and let sit in pans for 5 to 10 minutes then transfer cookies to cooling rack to cool completely.


Mon petit madeleine

As I mentioned a couple of posts ago, I was gifted Thomas Keller and Sebastien Rouxel’s Bouchon Bakery cookbook at the holidays.  After spending several days greedily consuming every page of the hefty tome, I emerged with one question: where to start?  Ever the opportunist, my answer came in the form of shopping.  Specifically, the chance to finally purchase a madeleine pan.

To be honest, while I’ve long wanted to make them, I’d actually eaten a madeleine before I headed off to Sufras to make my purchase.  Luckily,  Sufras has a little cafe and on that day, they had madeleines.  I purchased a few, strictly for research purposes of course.

Like many french treats, the madeleine is an exercise in delayed gratification.  Once the simple ingredients come together, they spend the night in the fridge.  The madeleine pan, coated in butter, spends the night in the freezer.

It’s worth it, I promise.

Each little shell-shaped mold gets a delicate piping of batter.

Et voila!  Gorgeous little tea cakes.

But wait, there’s more.  The original recipe calls for lemon oil.  I happened to be out, but I did have orange oil.   I also had chocolate (really, though, I always have chocolate).  As you’ll discover next week, I already had chocolate and orange on the brain and couldn’t help frosting one-side of each cake with a thin layer of orange infused chocolate.

These are lovely mid-afternoon with a cup of espresso or strong tea.

Thomas Keller, consider this fair warning.  I’m just getting started with you.

Soundtrack

I was in the mood for a little Harry.

Orange and Bittersweet Chocolate Madeleines 

adapted slightly from Bouchon Bakery by Thomas Keller and Sebastien Rouxel

Note–this recipe is really made for utilizing weight-based measurements.  A kitchen scale will make this 1,000 easier.

Ingredients

  • 1/4 C + 3 1/2 TBS (68 g) all-purpose flour
  • 1/2 TSP (2.2 g) baking powder
  • 1/4 TSP (.6 g) Kosher salt
  • 1/4C+ 1 TBS (83 g) eggs (note–using extra large eggs this was almost exactly 2 eggs)
  • 1/4 C + 1 1/4 TSP (55 g) granulated sugar (note–I used superfine)
  • 2.3 Ounces (66 g) unsalted butter at room temp plus more for the pan
  • 2 TSP (9 g) dark brown sugar
  • 1 1/4 TSP (9 g) clover honey
  • 1 to 2 drops orange oil
  • 6 ounces bittersweet chocolate, chopped
  • 12 mold madeleine pan

Ingredients

  1. Sift flour and baking powder together into a medium bowl.  Whisk-in salt.
  2. Combine the eggs and sugar in the bowl of a stand mixer fitted with a whisk attachment.  Mix on medium speed for about 60 seconds.
  3. Increase the speed to high and whip for about 4 minutes until the batter lightens in color and doubles in volume.
  4. While whisking, heat butter, brown sugar and honey in a small saucepan over medium heat, whisking to dissolve sugar.  Remove from heat.
  5. Remove bowl from the mixer and fold in remaining dry ingredients until just combined.
  6. Pour warm butter mixture over the batter and add orange oil.  Fold until incorporated and batter is smooth.
  7. Cover and allow to rest in fridge over night.  Brush pan with melted butter and place in freezer.
  8. Preheat oven to 350 degrees.
  9. Transfer the batter into a pastry bag or ziplock and snip a corner so that the opening is just over 1/2 inch.
  10. Pipe batter into molds.  Tap the bottom of the pan against the work surface to smooth the tops.
  11. Bake for 8 to 9 minutes until the tops are lightly browned and a skewer inserted into the center comes out clean.
  12. Immediately un-mold and place on a cooling rack.
  13. Once cake are completely cool, melt chocolate in a double boiler or microwave.
  14. Using an off-set knife, gently spread a thin layer of melted chocolate on non-etched sides of cakes.  Allow to harden.


Nope, Germany does not have palm trees

I recently learned that TD is a fan of german chocolate cake.   That got the wheels turning.  And, in true pink-peppercorn style I thought; ‘he says he likes german chocolate cake, how about if I make deconstructed german chocolate brownies.’  In my defense, I discovered his affinity because he chose german chocolate cake ice cream at Baskin Robbins.  So…I learned about one thing from another thing and then made something else entirely.  Sounds about normal.

It wasn’t until I was making the dulce de leche that it struck me as odd that something from Germany included coconut as an ingredient.

Now, I’ve never been to Germany, but, I am fairly certain the Bavarian Forest is not home to palm trees.  So, no German coconuts.  Which begs the question–how did the German chocolate cake get its coconut?

The answer?  It didn’t.

The name is actually a bastardization of a recipe that utilized a chocolate by Bakers Chocolate called German’s (after the man who created it).  The original cake (at least according to every source I could find) was created by a Dallas housewife in 1957 and was called German’s Chocolate Cake.  This confection calls a milk-chocolate cake its base and is filled and topped with a pecan, coconut and caramel icing.  In addition to coconut my nod to the original uses dulce de leche and walnuts.  Because, that’s the beauty of baking.

A note on the dulce de leche.  You can buy it if you want.  Even my local understocked grocery store (you know, that one without the mushrooms) carries dulce de leche.  It just happens to cost about $10 a jar.  Do your wallet a favor.  Buy a $1.50 can of sweetened-condensed milk and follow one of the two recipes listed below.  Or, better yet, send me $10 and I’ll make the dulce de leche for you :).

If you like this you might like these

Dulce de Leche

Dulce de Leche Brownies

Soundtrack

The Lads.  I’ll explain later

German Chocolate Brownies

Ingredients

  • 12 ounces chopped milk chocolate
  • .5 lb (2 sticks) unsalted butter
  • 1.5  C sugar
  • scant 1/8 C high quality cocoa powder
  • 1 1/2 tsp kosher salt
  • 4 eggs
  • 2 C all purpose flour
  • 1 C toasted walnuts, chopped
  • 1 C (or more to taste) shredded coconut
  • 1 C mini bitter or semi sweet chocolate bits
  • 1 1/2 C dulce de leche (store bought or make your own here or here)

Directions

  1. Preheat oven to 350 degrees.  Line 9X13 pan with parchment and butter entire pan
  2. Using a heavy-bottomed sauce pan, melt butter on low.
  3. Once butter is melted, add chopped milk chocolate, remove from heat and let sit for 2-3 minutes.
  4. Whisk chocolate and butter until smooth.   Allow to cool to room temp.
  5. In a large bowl, whisk together sugar, cocoa and salt.
  6. Whisk-in eggs one-at-a-time, combining fully between each.
  7. Whisk-in milk chocolate mixture.
  8. Gently fold-in flour until just combined.  Fold-in walnuts, chocolate bits and coconut.  Transfer to prepared pan.
  9. Using a spoon, add dollops of dulce de leche at regular intervals (3 rows of 5 dollups should do you). Run a skewer through the caramel and batter to distribute.
  10. Bake for 34-45 minutes or until an inserted tester or toothpick comes out with moist crumbs when inserted.


Yes Please!

During the holidays I was somehow lucky enough to receive not one but two Bouchon Bakery cookbooks as gifts.  Alas, you’ll have to wait for a report on my adventures with Bouchon for another day.  Today we’re visiting what I traded the second Bouchon cookbook for: Jerusalem.  I’ve had my eye on this beautifully photographed and narrated cookbook by Yotam Ottolenghi and Sami Tamimi since it popped onto the scene last October.  I’ve long been intrigued by  cuisines that cross boundaries as a result of geographic and cultural proximity.  For me, there has also always been a deep stirring for this part of the world, a sort of calling of some memory from generations ago.  Most likely I’ve romanticized the idea, but there is a part of me that, despite a complete lack of hereditary evidence, believes this is where I started.

Genetics notwithstanding, it should be no surprise that I started the book with the sweets section. Specifically, a gorgeous pair of chocolate krantz cakes.  While the name was new to me, I’ve long been familiar with this particular delicacy in the form of babka.  Nearly identical in recipe, babka is the  Eastern European Jewish name for Israeli Jewish krantz cake.

Perhaps the exact opposite of a quick bread, krantz cake takes a day or so but is incredibly satisfying to make.

Yeast dough is topped with chocolate, pecans and sugar and rolled into a thick cigar. I apologize for the awful picture but…but the roll needed to be shown.

Then the real fun begins.  The roulade is split down the middle longways.

And twisted into a pretty braid.

One last proofing gives the dough a little volume.

This is one of those recipes that smells ridiculously delicious while in the oven.

Out of the oven you’ll wonder; ‘holy smokes, did I just make this?’  Oh, but there is more.  The piece de resistance is a thorough drenching of the still warm cake with simple syrup.  Now, you’ll ask yourself, ‘really, is this last step necessary on top of such obvious decadence.’  Yes, it is.

Quick recipes have a serious place in my heart.  In fact, I consider myself the queen of the brownie (at least in my own little kingdom of TD and a couple of Kitchen Gods).  But, this recipe was an absolute pleasure to make with an outcome equal to the time.

Soundtrack

Depeche Mode.  I know right?

Chocolate Krantz Cakes

from Jersualem, by Yotam Ottolenghi and Smi Tamimi, Ten Speed Press

Ingredients

CAKE

  • 4 1/2 C (530 grams) all purpose flour plus extra for dusting
  • 1/2 C (100 grams) superfine sugar
  • 2 tsp fast-rising active dry yeast
  • grated zest of one small lemon
  • 3 extra-large eggs
  • 1/2 C (120 ml water)
  • rounded 1/4tsp salt
  • 2/3 C (150 grams) unsalted butter at room temp. cut into 3/4 inch cubes
  • sunflower oil for greasing

CHOCOLATE FILLING

  • scant 1/2 C (50 grams) confectioner’s sugar
  • 1/3 C (30 grams) best quality cocoa powder
  • 4 1/2 ounces (130 grams) good quality dark chocolate, melted
  • 1/2 C (120 grams) unsalted butter, melted
  • 1 C (100 grams) pecans, coarsely chopped
  • 2 TBS superfine sugar

SYRUP (enough to cover both cakes)

  • 2/3 C (160 ml) water
  • 1 1/4 C (260 grams) superfine sugar

Directions

FOR THE DOUGH

  1. Place the flour, sugar, yeast and lemon zest in a stand mixer fitted with a dough hook and mix on low for 1 minutes.
  2. Add the eggs and water and mix on low speed for a few second, then increase the speed to medium and mix for 3 minutes, until the dough comes together.
  3. Add the salte and then start adding the butter, a few cubes at a time, mixing until it is incorporated into the dough. Continue mixing for about 10 minutes on medium speed, until the dough is completely smooth, elastic and shiny.  During the mixing, scrape-down the sides of the bowl a few times and throw a small amount of flour onto the sides so that all of the dough leaves them.
  4. Place the dough in a large bowl brushed with sunflower oil, cover with plastic wrap and leave in the fridge for at least half-a-day (overnight is best).
  5. Grease two 2 1/4 lb loaf pans (9X4 inches) with some sunflower oil and line the bottom of each pan with a piece of parchment paper.
  6. Divide the dough in half and keep one-half covered in the fridge.
  7. Make the filling by mixing together the confectioners’ sugar, cocoa powder, chocolate and butter into a spreadable paste.
  8. Roll-out the dough on a lightly floured surface into a rectangle measuring 15X11 inches.  Trim the sides to make them even.
  9. Use an offset spatula to spread half the chocolate mixture over the rectangle, leaving 3/4 inch border all around. Sprinkle half the pecans on top of the chocolate, then sprinkle with half the superfine sugar.
  10. Brush a little bit of water along the long end furthest away from you.
  11. Use both hands to roll-up the rectangle like a roulade, starting from the long side that is closest to you.  Be sure to roll tightly.
  12. Press to seal the dampened end onto the roulade and then use both hands to even out the roll into a perfect, thick cigar.  Rest the cigar on its seam.
  13. Trim about 3/4 inch off both ends of the cigar with a serrated knife.
  14. Using a serrated knife, gently cut the roll into half lengthwise, starting at the top and finishing on the seamm.
  15. With the cut sides facing up, gently press together one end of each half and then lift the right half over the left half.  Repeat the process, but this time lift the left half over the right.
  16. Gently squeeze together the other ends so that you are left with the two halves, intertwined, showing the filling on top.
  17. Carefully lift the dough into a loaf pan.
  18. Cover the pan with a wet tea towel and leave to rise in a warm place for 1-1 1/2 hours.  The cake will rise by 10-20 percent.
  19. Repeat with second ball of dough.
  20. Preheat oven to 374 degrees.
  21. Remove the tea towels, place the cakes on the middle rack of the oven and bake for about 30 minutes, until a skewer inserted in the center comes out clean.
  22. While the cakes are in the oven, make the syrup.
  23. Combine the water and sugar in a saucepan, place over medium heat and bring to a boil.
  24. As soon as the sugar dissolves, remove from te heat and leave to cool down.
  25. As soon as the cakes come out of the oven, brush all of the syrup over them.  Use up all the syrup.
  26. Allow cakes to cool until just warm, then remove from the pans and let cool completely before serving.

Is that a potato in your pocket or are you just happy to see me?

Let’s see if you can figure out where I’m going with this.

Start: riced potato.

Mash.

Add shredded coconut.

Mash.

Two, yes 2 pounds of confectioner’s sugar (I know, just don’t think about it too much).

Patient folding.  More folding.  A lot of folding.

Into the fridge.

Pizza roller + ruler.  Yes, I  used a ruler.  I use them often when baking, they make me feel secure.

Back into the fridge,

A little chocolatey skinny dip.

And allow me to present:

The Needham.

So, I was sitting in traffic on PCH one weekend morning and in my channel surfing landed on a story on NPR about these candies.   Famous in Maine, they are a very much the homemade Mounds bar with a surprising ingredient: potato.  Intrigued, I tried them for myself.  And you should too.  They were fun to make and when I shared?  People lost their heads.  I’m not kidding.  Lost.  Heads.

The story behind them is also fun.  For the original broadcast, go here: Maine’s Needhams, A Sweet Treat of Earthy Potatoes.  Incidently, it wasn’t until I went to write this post that I realized the story was part of a larger series, Americandy, Sweet Land of Liberty.  I swear, my honeycomb post from last week was completely unrelated.  And yet, here it is again.  Coincidence? Karma?

If you like this, you might like these:

Coconut (Festivus) Cake 

Chocolate Peanut Butter Bon Bons AKA Pete Schweedy’s Balls

Soundtrack

New Mumford and Sons

Needham Candies

adapted from food.com

Ingredients:

  • 3/4 cup mashed potatoes (not seasoned) (you could easily get this amount from a single large russet potato)
  • 1/2 teaspoon salt
  • 2 (1 lb) packages confectioners’ sugar
  • 1/2 cup butter
  • 2 (7 ounce) bags flaked coconut
  • 2 teaspoons vanilla
  • 18 ounces (about 1 1/2 packages)  chocolate chips or chopped bittersweet chocolate
  • 1/2 paraffin wax block, the same paraffin you melt to use on top jam (2 1/2 by 2 1/2)

Directions:

  1. Pare, cook, and mash potato to make three-quarters of a cup. Add salt.
  2. If you are making recipes right after boiling the potato, use the still-warm sauce pan or dutch oven. The pan should still be warm enough to melt the butter off the heat.  If not, turn on heat to low and allow butter to melt.
  3. Turn off heat and add mashed potato, confectioners sugar, flaked coconut, and vanilla.
  4. Mix well and turn into a buttered 9X13 inch pan and spread evenly.
  5. Refrigerate to harden.
  6. When hard, cut into small squares.  A pizza cutter works wonders but a knife will work too.  Ruler optional. Cutting into 1-inch squares yielded about 117 pieces.
  7. Place cut squares back into the fridge until dipping.
  8. For the dipping chocolate, again use a double boiler or place a heat-proof bowl over a sauce pan of simmering water.
  9. Add paraffin and allow to melt.
  10. Add chocolate and allow to melt.
  11. Stir well to mix ingredients.
  12. Dip in the chocolate mixture (with a fork, toothpick, or cake tester–I found it worked best when I placed a square on the tines of an upside down fork, dipped everything, let the excess run-off and then gently slid off the back of the fork with a second fork).
  13. Place on waxed paper to harden.
  14. This halves easily.

It’s alive!

Remember the volcano you made for your second grade science project?  Well, this is sort of like that only you get to eat the post-apocalyptic results.  Today on Miss Wizardmisanthropichostess, we’re making honeycomb.  Well, honeycomb the candy (though, I may have some Queen Bee tendencies).

Honeycomb’s humble beginnings start with sugar, corn syrup, honey and a little water.

Then, you turn up the heat and do a little buzzing dance.

Slowly, the color will turn from nearly clear to pale gold.

In goes the baking soda, and you know what happens next (think exploding volcano).

Before we move forward, we need to move back a little.  In my first attempt at making this confection, I let it get a little too golden before adding the baking soda.  This is what burned honeycomb looks like.  You don’t even want to know what burned honeycomb smells like.  Trust me.  So that you don’t make the same mistake, I’ve made some adjustments to the original recipe and added some instructions on using a thermometer.  If you’d like to forgo the technology, just made sure you watch the sugar lava closely and as soon as it gets to a uniform pale gold, add the soda.

This is what it should look like after the baking soda is mixed in.

Once it cools, the magic happens.   If you’ve ever had the Australian candy Violet Crumble, you know where I’m going with this.  Honeycomb’s frothy texture is simultaneously crunchy and chewy.  Incidentally, the first time I saw Violet Crumble, I read it as Violent Crumble.  So, Violent Crumble stuck.  In my fantasy world, the Violent Femmes’ favorite candy is Violent Crumble.

This honeyed treat is very good on its own. It’s also very sticky…especially if there is any humidity in the air.  The solution?  Cover it in chocolate (because, isn’t the solution to many of life’s problems the addition of chocolate?).

Baking is a world of uniformity.  Uniform shapes, precise measurements, attempts at symmetry.  I think this is why I love the decidedly un-uniform (does that make it “iform”) shapes the honeycomb makes.

Once the chocolate has set, these will keep in a cool place for a month or so.

Totally fun to make.  Even more fun to eat.

Since it happens to be October, and since October happens to be the month of Halloween, I thought I’d go with a candy theme for the first three weeks.  I realize that attempting to hand out homemade candy to trick-or-treaters would probably end in incarceration for most of us–so let it be known I’m not suggesting using any of these recipes on trick-or-treaters.  But…I bet you can think of a few ghosts and goblins who might enjoy some treats form your cauldron.

If you like this, you might like these

Toffee (insert your favorite nut)

Soundtrack

The Cure.  You thought I was going to say the Violent Femmes didn’t you?

Honeycomb Candy

Adapted from Gail Gand, Foodnetwork.com

Ingredients

  • 1 1/2 cups sugar
  • 1/2 cup water
  • 3 tablespoons honey
  • 1/3 cup corn syrup
  • 4 teaspoons baking soda, sifted
  • 12 ounces chocolate chips or bittersweet chocolate
  • 1 TBS shortening

Directions

  1. In a large saucepan, gently combine the sugar and water then add the honey and corn syrup.
  2. Boil until lightly gold colored and the sugar looks like light caramel (if using a candy thermometer, heat to 300 degrees).
  3. Add the baking soda and with a wooden spoon, stir in gently. It will foam up a lot.
  4. Pour the mixture onto a silpat or a piece of parchment paper on a sheet pan, and let cool. Break into pieces.
  5. Over a double boiler (or using a heatproof bowl over a pan of simmering water), add chocolate chips and shortening. Using a rubber spatula, fold gently until chocolate is melted and smooth.
  6. Line a sheet pan with parchment paper.
  7. One-at-a-time, drop honeycomb pieces into melted chocolate.  Using the back of a fork, quickly pull the candy out of the chocolate, let extra chocolate drip back into the pan.  Using a second fork, gently slide candy off of first fork and on to a parchment-lined sheet pan.
  8. Let set.  Store in airtight container in a cool, dry place.


Devil’s Food with Hazelnut Crunch Cake

Just in case you’ve forgotten, here is where we last left off:

Inspiration for recipes on The Misanthropic Hostess come from all over the place.  Sometimes I’m attracted to a new idea, ingredients or technique I haven’t worked with.  Other posts are inspired by memorable meals and childhood favorites.  And then, sometimes, I try a recipe for this singular reason: get in my belly!  This is one of those recipes.  Bon Appetit has this new thing going on where they offer additional recipes via mobile/tablet interface that don’t appear in the print magazine or, as far as I’ve seen, Epicurious.  They show you the picture and then send you to the mobile.  Such a tease.  Anyhow, this is one of those recipes.

Who doesn’t love chocolate and coffee together?

A single recipe makes three eight-inch cakes.

The crumb is pretty fine and loose.  If you are going whole-hog and decide to frost these babies, I suggest freezing them first.

While I liked the frosting included in this recipe, I still haven’t found the perfect chocolate frosting.  Good thing I like research.

Here is what makes this recipe special.  That hazelnut crunch pictured above?  It finds its way into each layer of the cake.  It’s like a little crunchy Nutella surprise!

Remember to leave some for the top.

Now, who needs a glass of milk?

The only suggestion I have is to maybe chop the hazelnut crunch to a finer grain for the middle cake layers.  As you can see from the piece below, the generous chunks sort of got in the way of the layer-flow.

This is a great special occasion cake indeed! And no TD, no peppercorns.

If you like this, you might like these

Chocolate Love Cake

Chewy Chocolate Cookies

Soundtrack

I discovered this new dude name Phillip Phillips.  Guess who doesn’t watch American Idol?

Devil’s Food Cake with Hazelnut Crunch

Bon Appetit, September 2012

Devil’s Food Cake

Ingredients

  • 2 1/3 C cake flour
  • 1 C unsweetened cocoa powder (I use Vahlrona)
  • 1 1/2 tsp baking soda
  • 1/4 tsp baking powder
  • 2 tsp instant espresso powder
  • 1 C hot coffee
  • 1 C buttermilk
  • 2 1/2 C sugar
  • 1 C (2 sticks) unsalted butter at room temp
  • 4 large eggs
  • 1 large egg yolk
  • 1 1/2 tsp vanilla extract
  • 4 oz semi-or-bittersweet chocolate, melted, cooled slightly

Directions

  1. Grease 3 8″ cake pans, line bottoms with parchment.
  2. Preheat oven to 350 degrees.
  3. Sift cake flour, cocoa powder, baking soda, salt and baking powder into a medium bowl.
  4. In a separate bowl (better yet, if you have it, use a multi-cup pyrex liquid measuring cup), dissolve espresso into hot coffee, whisk-in buttermilk, set aside.
  5. In a stand mixer (or with an electric mixer), beat sugar and butter until light and fluffy (5ish minutes), scraping-down bowl as needed.  Add eggs one-at-a-time, beating in between additions. Beat in egg yolk and vanilla.  Beat on high speed until doubled in volume and very fluffy, about 3 minutes.  Scrape bottom of bowl well making sure all ingredients are incorporated.  Beat 1 more minute.
  6. With mixer on low, beat in flour and coffee mixtures in alternating pattern, starting and ending with flour.
  7. Divide evenly among pans.
  8. Bake until tester inserted into center comes out clean (about 20 minutes).  Transfer to wire racks, let cake cool in pans for 30 minutes.
  9. Invert cakes onto racks, peel off parchment and let cool completely.  I like to do this step in advance, wrap each cake tightly in plastic wrap and then freeze.  These cakes will be much easier if frosted while frozen.

Frosting

Ingredients

  • 8 oz milk chocolate, chopped
  • 8 oz semi-or-bittersweet chocolate, chopped
  • 1 1/2 TBS light corn syrup
  • 1 1/2 C heavy cream
  • 1 C (2 sticks) chilled, unsalted butter, cut into 1/2″ pieces.

Directions

  1. Combine both chocolates and corn syrup in medium bowl.
  2. Bring cream to barely a boil in a small saucepan; pour over chocolate mixture.  Let sit for 2 minutes. Whisk until chocolate is melted and mixture is completely combined.
  3. Using a standing or electric mixer, beat chocolate mixture until cool, 5-6 minutes.
  4. Add-in butter a few pieces at a time, beating until incorporated between additions.  Continue to beat until thick and lightened in color (between 5-15 minutes).  If kitchen is hot or frosting feels thin, refrigerate.

Hazelnut Crunch

Hazelnut crunch

Assembly

  • Level-off cakes using a serrated knife.  Place 1 cake layer on a large plate or stand.
  • Using an offset spatula, spread about 1 cup frosting on bottom layer.  Spring 1/2 cup hazelnut crunch over frosting.  Place second layer over crunch.  Repeat.
  • Top third layer with frosting and decorate as desired.  Finish with hazelnut crunch.
  • Chill until frosting is set (3-4 hours).